

The Ninja Forms plug in simplifies the process of building professional looking forms for your WordPress site. It’s essential for business owners to have eye catching and easy to use forms on their website, to make the process of generating leads and registering customer information easy and streamlined. In this article, Ninja Forms are back with some need to know steps to simplifying the process of user authentication on your website forms.
reCAPTCHA v3: How Does it Work?
Instead of making your user finish a puzzle or answer a math problem to submit a form, Google ReCaptcha v3 works behind the scenes by returning a score after every WordPress form submission. The scores are sent to the v3 Admin Console, where they can then be used to determine whether or not you need additional authentication for your site.
Step 1. Retrieve the Google reCaptcha v3 Key and Secret
You will need to head over to Google’s reCaptcha page and add your site URL. You can do that by navigating here https://www.google.com/recaptcha/admin/create
- Register a new site
- Add a Label. Ideally, this should be the name of your site.
- From the reCaptcha Type dropdown, choose ‘reCaptcha V3’
- Add your Domain. If your site is a development site, this will not work, so make sure the website is live to the public.
- Access the ReCaptcha terms of service
- Submit
- Copy the Site Key and Secret Key to your clipboard. You will be pasting these credentials into Ninja Forms reCaptcha Settings later.
Step 2. Add the Key and Secret to Your Ninja Forms Settings
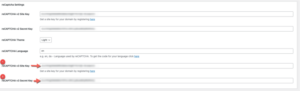
Navigate to Ninja Forms > Settings > Advanced Settings and look for the section titled reCaptcha Settings. This is where you will paste in the key and secret you copied to your clipboard in step one. Add the ReCaptcha v3 Site Key and reCaptcha v3 Secret Key credentials to their corresponding fields. If you can’t find them, they are directly below the ReCaptcha Language field.
Step 3. Enable the v3 reCAPTCHA Form Action
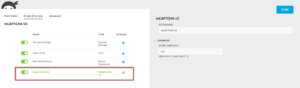
View your WordPress form by navigating to Ninja Forms > Dashboard and selecting your form. Click on the Email and Actions tab in the form menu. This is where you will add Google v3 reCaptcha action to your WordPress form. To add the action, click on the plus sign in the bottom right to bring up the menu of the actions. Select the ReCaptcha v3 action to add it to your WordPress form and publish.
Advanced – Score Threshold
Under the Advanced drop-down within the reCAPTCHA v3 action is a score threshold. By default, this is set to Google’s standard of 0.5. To determine the score most appropriate for your form, reference the v3 Admin Console
If it’s Invisible, How Do I Know It’s Working?
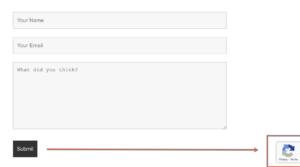
View your form on the front end and look for the Google Recaptcha v3 icon at the bottom-right of your page. This icon signifies that reCAPTCHA v3 is set up and ready to go.
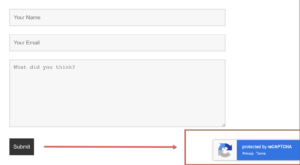
If you aren’t seeing this icon, you will need to make sure the reCAPTCHA v3 action has been added and that your reCAPTCHA credentials match the v3 credentials you created in step one.
Google has excellent resources to assist you, like their Google Recaptcha v3 Documentation and reCaptcha Troubleshooting guides. Otherwise, our customer support team would be happy to assist you if you are still unable to get up and running.
With Ninja Forms, you no longer need to be a coding expert to build beautiful forms that enhance your customer experience. The Ninja Forms membership plan has been designed to offer an affordable package that includes commonly needed features, so that you have all you need to customise your forms to fit your business. And if there’s only one feature that you need, no problem. The Ninja Forms add-on’s let you add only what you need, when you need it!
Sponsored Content: This post is sponsored content and the placement has been paid for or contains affiliate links. For full information, see our terms of use


