Thinking of starting WordPress blog or website? Millions use WordPress. You’d be in good company there. You’d also enjoy all the plugins and customizations that can make your entrepreneur life easy! But where do you start?
If you’re intimidated by all the setup and don’t want to mess it up or start wrong by winging it, we’ve put together this guide for you. Follow it step by step and your first WordPress blog would stand on a strong foundation.

1. Prepare your domain name.
This is your blog name, your website address. Ours is businessbusinessbusiness.com.au
What’s yours gonna be? Think of something optimised for your business, and see if it’s not taken yet! List down the possibilities so you can check their availability one by one.
Even if it’s available, see if it has any negative connotations. Take your time. It can be a pain to change your domain name later on, because you discover something bad about it, or because you don’t like it!
2. Choose your hosting.
At WordPress.org, you provide your domain name and host your own blog. Your host is where your blog would live on the internet. All your website content– blogs and images and forms– are stored here. All websites need hosting!
Hosting sites like WPEngine are built for wordpress and a great place to start.
When looking for your hosting platform, you want a good reputation of dependability and support. Features and services may include the domain name, backups, among others.
3. Install WordPress.
Your hosting platform would have WordPress in its list of platforms. Once you click Install, you’d be prompted to enter your domain name, and your admin username and password.
And that’s it! You’re ready for the good parts: customizing and blogging!
4. Choose your WordPress blog theme.
On your WordPress Dashboard, click Appearance to open the dropdown of Themes, Widgets, Menus, and so on. These menus allow you to customize your blog/website’s looks. You want it to be beautiful and inviting, and a match to your brand.
The thousands of themes to choose from can be overwhelming, but you can filter your choices by color, popularity, and so on. Look at the typography, design, colors and the elements you want your blog/site to have.
Once you’ve chosen a theme, click Install. We are Divi fans here so you might want to explore Elegant Themes
4.1 Customizations and plugins
Now that you’ve chosen a theme, you can make it unique and specially made for your website with colors, menus, widgets, and plugins, which are tools and apps that add valuable features to your blog or website.
5. Create your pages and blog posts.
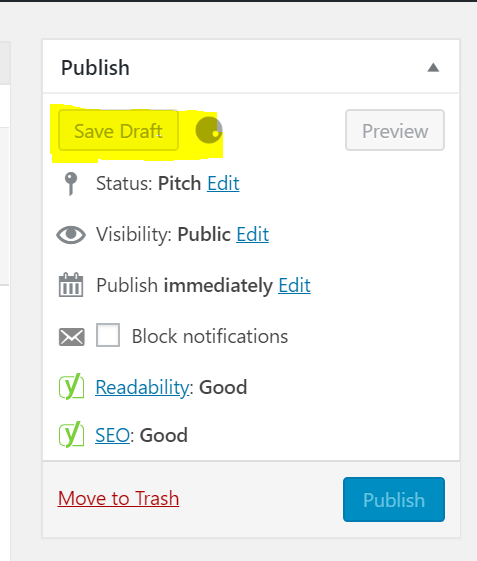
Now you can fill it all with words and images. Your homepage, your About page, your blog. You can now create your first blog post! Click Save Draft instead of Publish, so you can polish everything before going live.

6. Add a Contact Form
This is an important plugin. You need a Contact Page, and your contact page needs a contact form, a vital piece for customer engagement and lead generation.
You’ve probably noticed other websites/blogs have a Contact page with a contact form. It’s there for a reason. Business inquiries don’t belong in the Comment box, and sometimes the best people–your ideal customers– don’t like using that space. They prefer direct contact! Many startups think they didn’t need a contact form yet– they simply add their emails, phone numbers, and addresses on their websites!
That adds credibility to some. After all, business listings have that information. But it also has this inevitable and very annoying result: spam.
With WPForms, you have a VIP door for your leads and readers while fishers and miners can’t get your email address.
This is your first interaction with your customers and it can be simple but very impressive. In your contact forms, you can add information to set customer expectations, about your office hours, and how fast you can answer emails, and so on.

WPForms Lite is a free plugin. Just look for the WPForms Lite plugin from the WordPress plugin repository, install it, and activate.
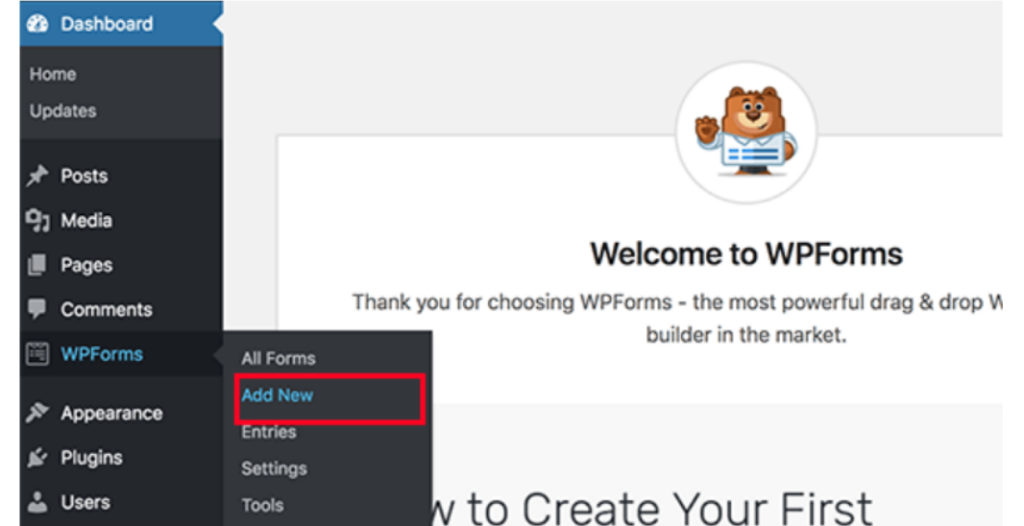
You’d then see the WPForms tab added to your admin menu. Click “Add New” and you’re good to start your WordPress contact form.
You can create various forms, like polls and surveys, and have them ready to add to pages or blog posts.

7. Add Google Analytics
You can’t skip this, even if– especially if–you’re just getting started. Analytics would give you the data you need to keep going and keep getting better. You’d know how many people are visiting which blog posts, where they’re from, and what else they do on your site.
Go to the Google Analytics website to register with your Gmail account. Login and sign up for a free Analytics account. Fill in your information and website URL. You’d receive your Google Analytics tracking code.
What do you do with that? As a beginner, use another plugin to make it hassle-free for yourself.
On WordPress, install and activate the MonsterInsights plugin.
Once activated, you’ll see Insights in your admin menu. Click it, click Settings, and authenticate it with your Google Account to connect your WordPress blog to your Google Analytics account. There will be easy instructions to complete the Setup. Once completed, you’ll see Insights from MonsterInsights right there from your Dashboard.
8. Your WordPress blog needs SEO
You’ve probably heard of SEO. It’s search engine optimization. Simply put, that’s what makes your site and blog posts visible in search engines, through the use of keywords that match what people search for online.
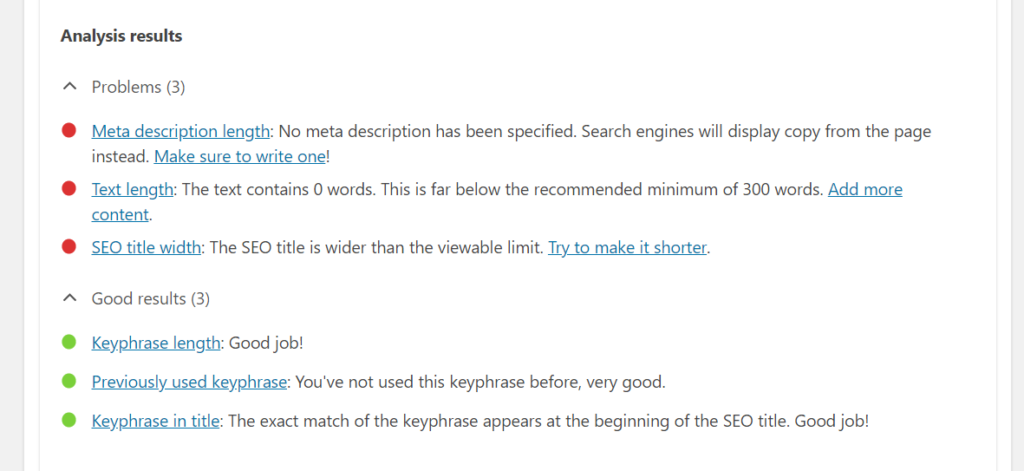
The easiest way to make sure you’re using good SEO? Install and activate the Yoast plugin, which also has a nice configuration wizard to help you with setup. Once done, you’ll see the SEO menu in your Dashboard, and you’ll also get helpful hints in every blog post!

And that’s it. You’re off to a good start with your blog.
As you build it with more content, make sure you install and activate other essential plugins: backup, security, and performance optimization, to make sure your site is safe and speedy.
Be diligent in adding content. Content attracts decent traffic, and you need decent traffic to monetize your blog with AdSense and affiliate marketing, where you earn money from referring your visitors to other valuable businesses!
Exciting stuff. Good luck with your WordPress blog!
Sponsored Content: This post is sponsored content and the placement has been paid for or contains affiliate links. For full information, see our terms of use


