
Sponsored Content: This post is sponsored content and the placement has been paid for or contains affiliate links. For full information, see our terms of use
Add the same bars and notifications on your blog or store! OptinMonster has easy-to-install announcement and notification bars you can add to your website, WooCommerce or Shopify store.
How do notification and announcement bars work?
As the name says, announcement and notification bars notify your site visitors about anything you want them to know. No need for them to scroll: the announcement is right there on top of the page. It’s what they see first, and it’s what they remember as they go around your site.
The result? You get results. You get the conversions you aim for! You reduce cart abandonment, you gently but effectively push your site visitors to complete their purchases.
Use notification and announcement bars for:
- A new promotional offer
- Promo codes
- Add-to-cart reminders for upcoming sales
- Registration or submission calls for events or contests
- Creating urgency with a countdown timer
- Growing your email list
- Announcing significant information like new business hours, shipping and purchase information, or new content updates on your site
- Providing emergency or time-sensitive alert message
- Updating your company’s services
The possibilities are limitless!
How to Install OptinMonster Announcement and Notification Bars
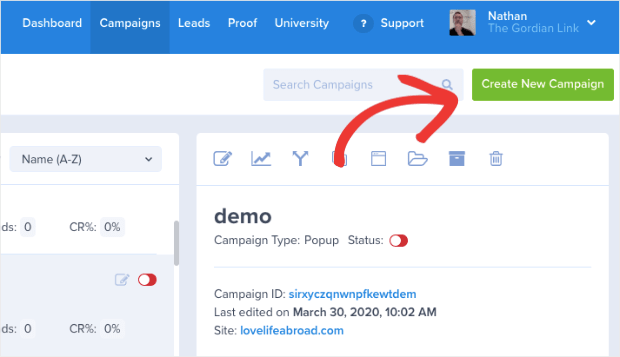
- Login to your OptinMonster account.
- On the right side of your dashboard, click the Create New Campaign button.
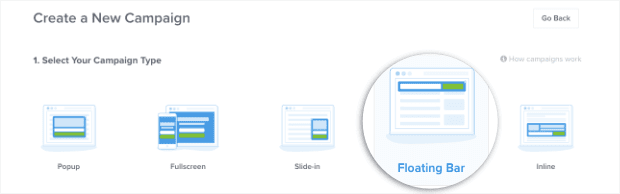
- You’ll see the campaign types on the screen. Select the Floating Bar.
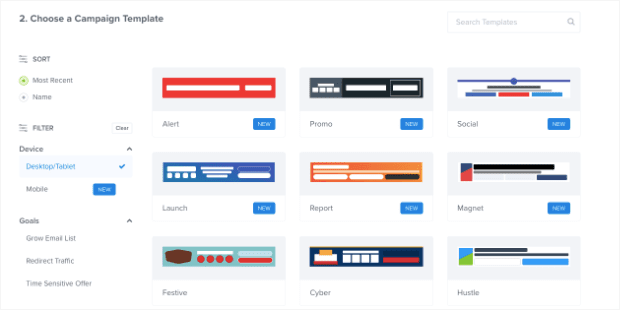
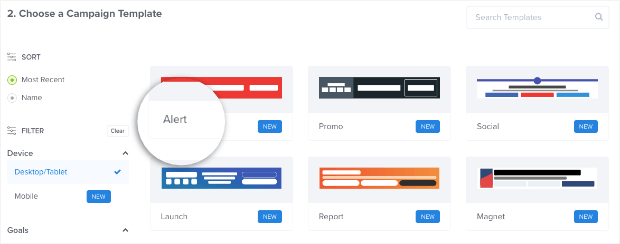
- Next, choose your template. OptinMonster has over 50 templates that can instantly complement the look of your site or store. You want your floating bar to have enough contrast to call attention anyway, so don’t worry about exact matches.
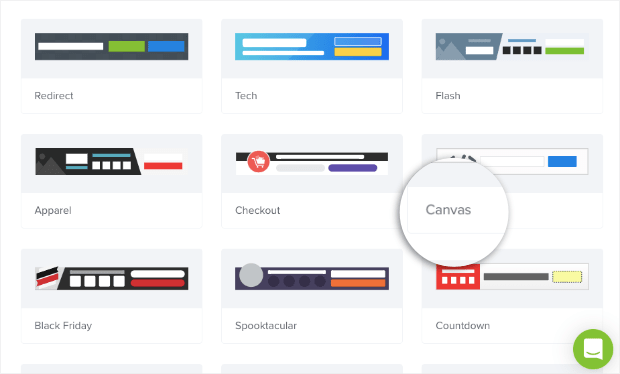
If you don’t see the template you want, you can build and customise with the blank template, Canvas.
Here’s the tutorial on creating the alert:
In this tutorial, we’re going to use an attention-grabbing template called Alert:
Note that if you don’t happen to like red, you can change the template’s color. Now, your website notification bar template is in your OptinMonster editor:
- The first thing that we’ll do to our template is to change the position and make it rest at the top of the page. To do that, go click Floating Settings on the left-hand side editor:

Then click the toggle switch to change the position of the Floating Bar:
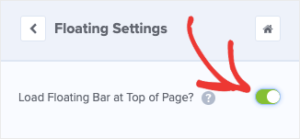
Now your Floating Bar campaign will be on the top of your editor:
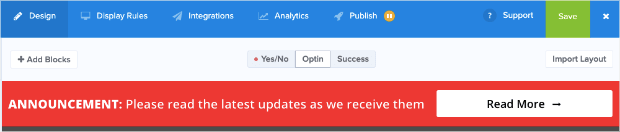
Customise the text for your campaign
- Then we need to change the text of your campaign. With OptinMonster’s easy-to-use campaign editor, this is super simple.
- Just click the text that you want to modify, and you’ll be able to change the text in the left-hand side menu:
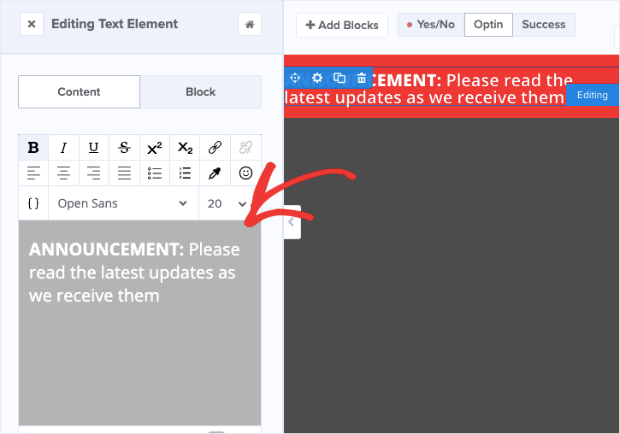
Use a headline that will grab your audience’s attention.
Always set aside time to come up with a good web copy for your announcement or notification banner. Or delegate this to a good copywriter. You’ll want to be precise and effective in connecting with your audience, and you have limited space in this bar, so make the most of it!
Customise the button
- If you’re redirecting your visitors to landing pages or a separate site to review your service updates in more detail, the simple default text will likely work just fine.
- But if you do want to change some aspect about your button, you simply need to click the button element in the editor. Then you can modify every part of your button in the left-hand side menu, like the text:
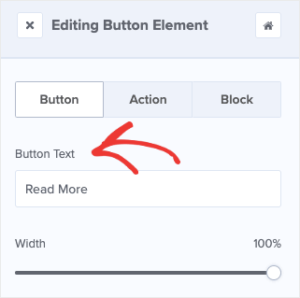
- In the OptinMonster editor, you can customize just about anything for your website notification bar button that you want. You can change the:
- Width
- Alignment
- Color
- Icon
- Icon spacing
- Text decoration
- Border
And so much more.
- You can change the background color by simply clicking on the background in your editor.
Here’s how to customize your call to action button:
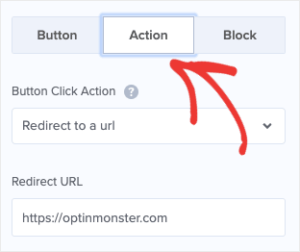
- To change what happens when someone clicks on your call to action, click on the button element in your campaign editor. That will pull up the button editing tools.
- Click on the Action tab in the left-hand side editor menu.
- Add the URL of the web page where you want your audiences to go in the Redirect URL field:
Another important adjustment: Target immediately
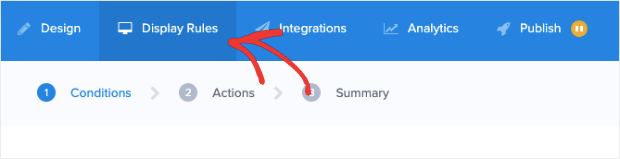
- Go to the Display Settings at the top of your editor menu.
- By default, your campaign will appear to visitors who stay on your page for 5 seconds or longer. Change that from Is at least to Is immediate for important announcements.
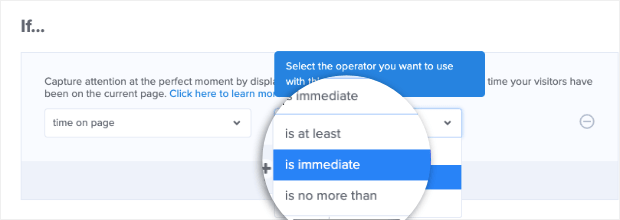
But use this Is at least setting for popups with value propositions to enhance user experience.
And you’re done.
Don’t forget to hit Save!
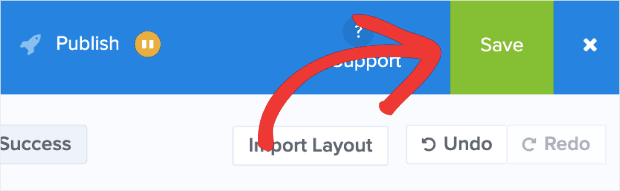
And then Publish your campaign! You now have a fully functional website notification bar at the top of your website.


